Install PgAdmin4 on Rocky Linux 8
pgAdmin is the most popular and feature rich open source administration and development platform for Postgresql, the most advanced open source database in the world.
In this tutorial, we will show you how to install PgAdmin 4 on Rocky Linux 8
Before installing PgAdmin, you must install postgresql on your system. you can follow below url to install postgresql.
Also Read -> How to Install Postgresql on Rocky Linux
Step 1: Add pgadmin repo
First we install yum utils package and disable the postgresql common repositories
with the following commands.
sudo dnf install yum-utils
sudo yum-config-manager --disable pgdg-common
Now we will add the PgAdmin repository by downloading from official website.
sudo dnf install wget
sudo wget https://ftp.postgresql.org/pub/pgadmin/pgadmin4/yum/pgadmin4-redhat-repo-2-1.noarch.rpm
once it is downloaded, you can install it
sudo rpm -ivh pgadmin4-redhat-repo-2-1.noarch.rpmAlso Read -> How to Migrate from Centos 8 to Alma Linux 8
Step 2: Install PgAdmin4
Now update the system repositories using dnf and install PgAdmin4
sudo dnf update
sudo dnf install pgadmin4
output:
Last metadata expiration check: 0:12:47 ago on Wed 06 Oct 2021 12:35:28 PM IST.
Dependencies resolved.
========================================================================================================================================================================
 Package                                  Architecture                 Version                                                    Repository                       Size
========================================================================================================================================================================
Installing:
 pgadmin4                                 noarch                       5.7-1.el8                                                  pgAdmin4                        6.2 k
Installing dependencies:
 desktop-file-utils                       x86_64                       0.23-8.el8                                                 appstream                        79 k
 emacs-filesystem                         noarch                       1:26.1-5.el8                                               baseos                           68 k
 libatomic                                x86_64                       8.4.1-1.el8                                                baseos                           22 k
 pgadmin4-desktop                         x86_64                       5.7-1.el8                                                  pgAdmin4                         87 M
 pgadmin4-server                          x86_64                       5.7-1.el8                                                  pgAdmin4                         85 M
 pgadmin4-web                             noarch                       5.7-1.el8                                                  pgAdmin4                        8.6 k
 python3-mod_wsgi                         x86_64                       4.6.4-4.el8                                                appstream                       2.5 M
 python3-pip                              noarch                       9.0.3-19.el8.rocky                                         appstream                        19 k
 python3-setuptools                       noarch                       39.2.0-6.el8                                               baseos                          162 k
 python36                                 x86_64                       3.6.8-2.module+el8.4.0+597+ddf0ddea                        appstream                        18 k
 xdg-utils                                noarch                       1.1.2-5.el8                                                appstream                        83 k
Enabling module streams:
 python36                                                              3.6
Transaction Summary
========================================================================================================================================================================
Install  12 Packages
Total download size: 174 M
Installed size: 542 M
Is this ok [y/N]: y
Step 3: configure pgAdmin
once pgadmin is installed,you need to be configure it using below script.
sudo /usr/pgadmin4/bin/setup-web.shoutput:
Setting up pgAdmin 4 in web mode on a Redhat based platform...
Creating configuration database...
NOTE: Configuring authentication for SERVER mode.
Enter the email address and password to use for the initial pgAdmin user account:
Email address: admin@gmail.com
Password:
Retype password:
pgAdmin 4 - Application Initialisation
======================================
Creating storage and log directories...
Configuring SELinux...
/usr/pgadmin4/bin/setup-web.sh: line 87: semanage: command not found
/usr/pgadmin4/bin/setup-web.sh: line 89: semanage: command not found
The Apache web server is not running. We can enable and start the web server for you to finish pgAdmin 4 installation. Continue (y/n)? y
Created symlink /etc/systemd/system/multi-user.target.wants/httpd.service → /usr/lib/systemd/system/httpd.service.
Apache successfully enabled.
Apache successfully started.
You can now start using pgAdmin 4 in web mode at http://127.0.0.1/pgadmin4
if selinux is enabled on your system you can disable it as below.
sudo setenforce 0After executing above command selinux disable temporarly, if you want to do perminently then disable it in /etc/sysconfig/selinux.
Also Read -> How to Install Apache Maven on Rocky Linux
Step 4: Access PgAdmin
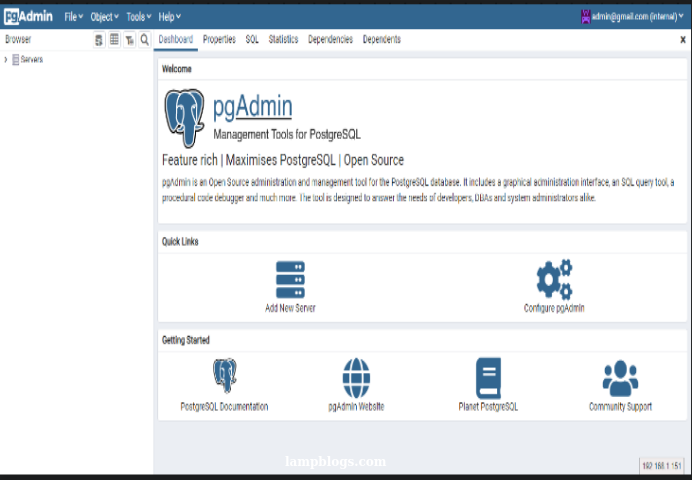
Now we can access the pgAdmin4 web interface for the first time by using web browser and hit the url as http://ip_address/pgadmin4.


Also Read-> How to Install Docker and Docker Compose on Rocky Linux


