Install wordpress in ubuntu 18.04
wordpress is most popular open-source blogging and CMS platform.WordPress is build with PHP. You can host it like you would any other web app written in PHP. we are going to need to set up Ubuntu as either a LAMP or LEMP server.
prerequisites:
For this tutorial we will use LAMP server.However you can install Apache,mysql and php following below steps incase you are installing on fresh server.
Step 1: Install Apache,php,mysql
After connecting your server ssh with root or any other user with sudo privileges, install apache,mysql and php softwares like below.
root@ubuntu18:~# apt update
root@ubuntu18:~# apt install apache2
root@ubuntu18:~# systemctl status apache2
root@ubuntu18:~# apt install mysql-server
root@ubuntu18:~# apt install php libapache2-mod-php php-mysql
you can follow our complete tutorial if you face any issues while installing LAMP.
Install LAMP stack on Ubuntu 18.04
Step 2: create database
now we will create database for wordpress. we will login with to mysql shell with the following command.
root@ubuntu18:~# mysql -u root -pIt prompts to enter mysql root password. Then create new db and user.
mysql> create database wordpress;
Query OK, 1 row affected (0.00 sec)
mysql> grant all privileges on  wordpress.* to lampblogsuser@'localhost' identified by 'strongpassword';
Query OK, 0 rows affected, 1 warning (0.03 sec)
mysql> flush privileges;
Query OK, 0 rows affected (0.00 sec)
mysql> exit
you can replace strong password with Actual password as per password policy.
Step 3: download wordpress
Next download latest version of wordpress from wordpress site using wget.
root@ubuntu18:~# cd /var/www/html/
root@ubuntu18:/var/www/html# wget https://wordpress.org/latest.tar.gz
root@ubuntu18:/var/www/html# tar -xvzf latest.tar.gz
root@ubuntu18:/var/www/html# rm -rf latest.tar.gz
root@ubuntu18:/var/www/html# chown www-data:www-data wordpress -R
Now goto wordpress document root folder and change database details in wp-config.php like below.First we will copy sample file as wp-config file.
root@ubuntu18:~# cd /var/www/html/wordpress
root@ubuntu18:/var/www/html/wordpress# cp wp-config-sample.php wp-config.php
root@ubuntu18:/var/www/html/wordpress# vi wp-config.php
And update the database settings, replace dbname and user and password which you are created earlier for wordpress db.
define( 'DB_NAME', 'wordpress' );
/** MySQL database username */
define( 'DB_USER', 'lampblogsuser' );
/** MySQL database password */
define( 'DB_PASSWORD', 'strongpassword' );
and save wp-config file and exit.
Step 4: configure apache vhost
Edit the Apache virtual hosts configuration for our WordPress domain
root@ubuntu18:~# vi /etc/apache2/sites-available/domainname.confAdd below content to above file
<VirtualHost *:80>
ServerAdmin admin@lampblogs.com
ServerName  example.com
ServerAlias www.example.com
DocumentRoot /var/www/html/wordpress
ErrorLog /var/www/html/wordpress/example_error.log
CustomLog /var/www/html/wordpress/domainname_access.log combined
 <Directory "/var/www/html/wordpress">
        Options Indexes FollowSymLinks Includes ExecCGI
        AllowOverride All
        Require all Granted
     </Directory>
 </VirtualHost>
To enable virtual host and restart apache service run below commands
root@ubuntu18: ln -s /etc/apache2/sites-available/domainname.conf /etc/apache2/sites-enabled/domainname.conf
root@ubuntu18: systemctl restart apache2
Step 5: configure wordpress
Now you can access wordpress interface via your domain name.Here i am accessing with my local ip.
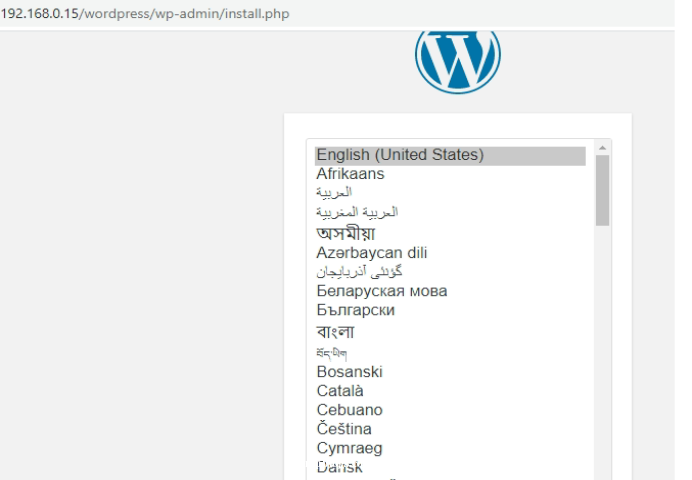
choose your language and click on continue then it asks to enter your email address,title and password etc like below.
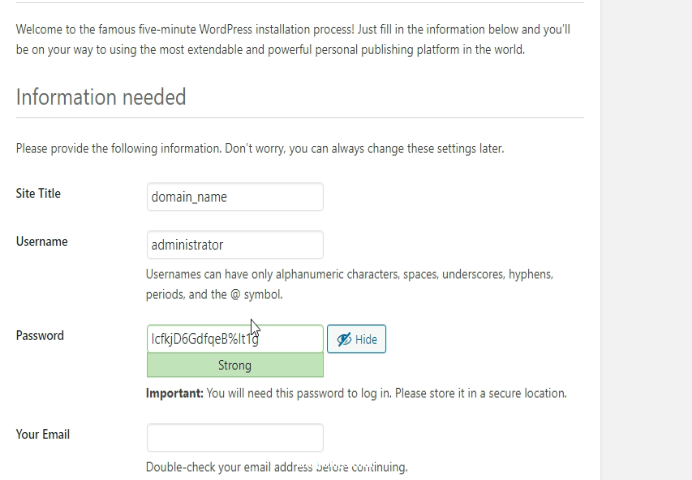
click on Install wordpress then installation will complete it comes success page says wordpress has been installed and success. Then enter your username and password and click on Login.
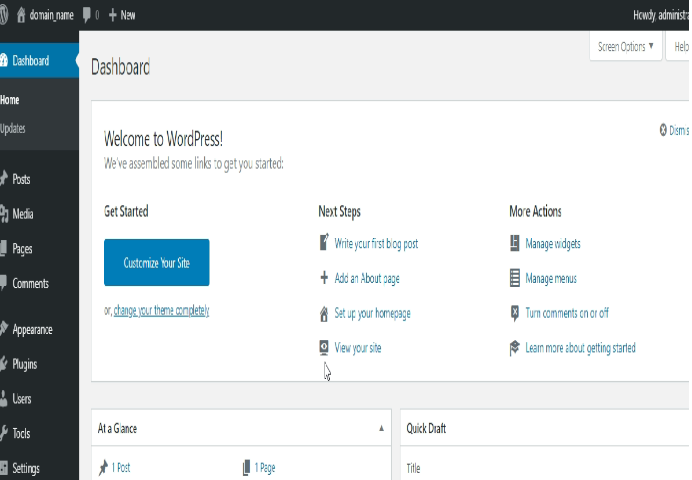
Thats'it.Now you can customize your wordpress site by installling plugins and themes as per your requirement.