
Install Odoo 14 CRM/ERP on CentOS 8
Odoo is a suite of business management software tools including CRM,e-commerce,billing,accounting,manufacturing,warehouse,project management, inventory management and many other features.The Community version is a libre software and free edition, licensed under the GNU LGPLv3. The Enterprise version has proprietary extra features and services and has a licensing cost depends upon the modules.
In this tutorial, we will show you how to install Odoo on CentOS 8
Step 1: Install dependency packages
First we will install epel repo using dnf.
[root@localhost ~]# sudo dnf install epel-releaseThen install required dependecy packages as shown below.
sudo dnf install python3 python3-devel git gcc redhat-rpm-config libxslt-devel bzip2-devel openldap-devel libjpeg-devel freetype-devel curl unzip Step 2: Install Postgresql
Odoo uses PostgreSQL to store its data. You can install the PostgreSQL server from the standard CentOS 8 repositories.
sudo dnf install @postgresql:12To initialize PostgreSQL database server execute following command.
sudo postgresql-setup --initdb --unit postgresqlNow enable and start postgresql service.
sudo systemctl enable --now postgresqlyou can verify installation with following command.
sudo -u postgres psql -c "SELECT version();"create postgresql datbase user as Odoo.
sudo su - postgres -c "createuser -s odoo14"create Linux user
you can add Odoo system user and group that we need to run Odoo service. and home directory will define as /opt/odoo as shown below.
sudo useradd -m -U -r -d /opt/odoo14 -s /bin/bash odoo14Also Read -> How to Install Ansible on Centos 8
Step 3: Install wkhtmltopdf
Wkhtmltopdf is an open-source tool that can be used to convert the HTML format to a PDF and various image formats.so odoo can print pdf reports.Its available at wkhtmltopdf download url.
wget https://github.com/wkhtmltopdf/packaging/releases/download/0.12.6-1/wkhtmltox-0.12.6-1.centos8.x86_64.rpmand install it with following command.
dnf localinstall wkhtmltox-0.12.6-1.centos8.x86_64.rpmStep 4: Install Odoo14
switch to odoo user to start installation of Odoo
su - odoo14First we will start by cloning the Odoo source code from the Odoo GitHub repository through the following url.
git clone https://www.github.com/odoo/odoo --depth 1 --branch 14.0 /opt/odoo14/odooAlso Read -> How to Install ImageMagick and Php Imagick on Centos 8
Next go to the /opt/odoo14 directory and create Python virtual environment for the Odoo installation.
cd /opt/odoo14
python3 -m venv venv
once virtual environment is created, we can activate it with source command.
source venv/bin/activateThen, install the required Python modules.
pip3 install -r odoo/requirements.txtoutput:
[odoo14@localhost ~]$ python3 -m venv venv
[odoo14@localhost ~]$ source venv/bin/activate
(venv) [odoo14@localhost ~]$ pip3 install -r odoo/requirements.txt
Once the installation of the Python modules is complete, deactivate the virtual environment and exit.
deactivate && exitWe will create a new directory for the custom modules and change its ownership to odoo14 user.
mkdir /opt/odoo14/odoo-custom-addons
chown -R odoo14:odoo14 /opt/odoo14/odoo-custom-addons
next, to create a configuration file for the Odoo instance.
sudo nano /etc/odoo14.conf[options]
; This is the password that allows database operations:
admin_passwd = Strong_admin_passwd
db_host = False
db_port = False
db_user = odoo14
db_password = False
addons_path = /opt/odoo14/odoo/addons, /opt/odoo14/odoo-custom-addonssave the file and exit.
Note: Be sure to replace the "Strong_admin_passwd'' with your own password.
Also Read -> How to Install Apache Maven on Centos 8
Step 5: Create a systemd Unit File
sudo vim /etc/systemd/system/odoo14.service[Unit]
Description=Odoo14
Requires=postgresql.service
After=network.target postgresql.service
[Service]
Type=simple
SyslogIdentifier=odoo14
PermissionsStartOnly=true
User=odoo14
Group=odoo14
ExecStart=/opt/odoo14/venv/bin/python3 /opt/odoo14/odoo/odoo-bin -c /etc/odoo14.conf
StandardOutput=journal+console
[Install]
WantedBy=multi-user.targetNow Reload system services with the following command.
sudo systemctl daemon-reloadstart and enable odoo service
sudo systemctl enable --now odoo14
sudo systemctl status odoo14
output:
[root@localhost ~]# systemctl status odoo14
● odoo14.service - Odoo14
   Loaded: loaded (/etc/systemd/system/odoo14.service; enabled; vendor preset: disabled)
   Active: active (running) since Mon 2020-11-30 08:26:26 EST; 8s ago
 Main PID: 25835 (python3)
    Tasks: 1 (limit: 6200)
   Memory: 53.4M
   CGroup: /system.slice/odoo14.service
           └─25835 /opt/odoo14/venv/bin/python3 /opt/odoo14/odoo/odoo-bin -c /etc/odoo14.conf
Nov 30 08:26:26 localhost.localdomain systemd[1]: Started Odoo14.
Step 6: Configure Firewall
If firewall is running on your system,you can modify the firewall rules to allow users to access Odoo.
firewall-cmd --zone=public --permanent --add-port=8069/tcp
firewall-cmd --reload
Also Read -> Reset root password in MySQL 8
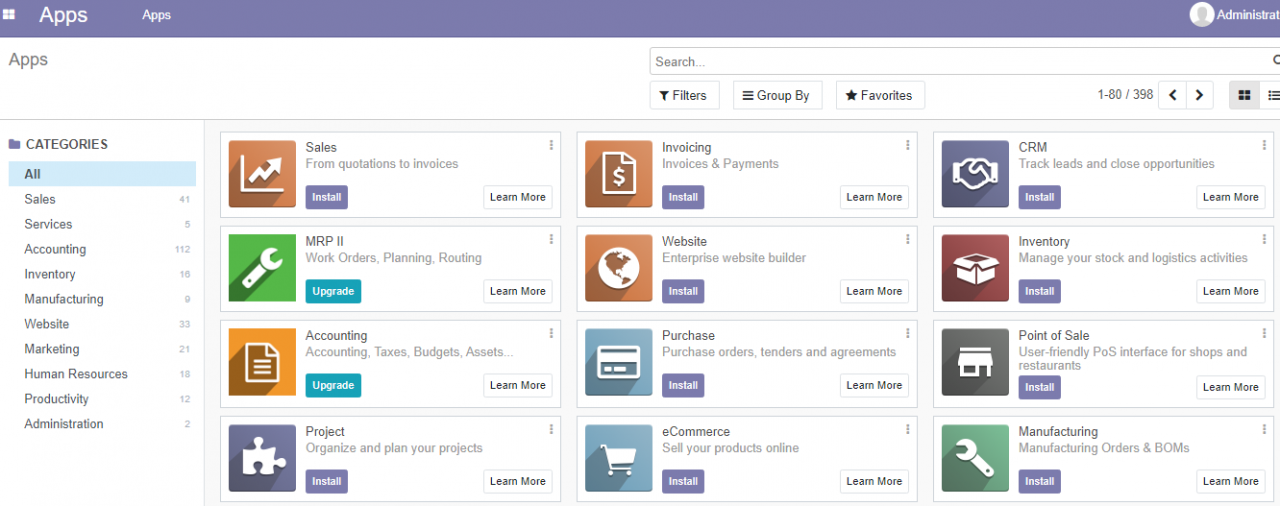
Step 7: Access Odoo
you can open your favourite browser and navigate to http://ip_address:8069

you can provide Master Password,Database name, Email, Password etc and click on the create database button.you will be redirected to the Odoo 14 Administration page which is showing various applications that can be installed.
Now you have successfully learned how to install odoo 14 on centos 8 system.