
Install and configure Zabbix on centos 7
Zabbix is a powerful open source monitoring solution used to monitor server applications, systems, Network devices, Hardware appliances, IoT devices, e.t.c. Its backend is written in C and Java while the user web interface written in PHP.
Zabbix uses client (Zabbix Agent) installed on the monitored client-server to collect the data. Also, it can monitor standard services such as e-mail, web service without installing a client on the monitored devices.
Zabbix is free, released under the GPL license, so it is free commercial and non-commercial use.
prerequisites:
- Apache web server
- PHP with required extensions
- MySQL/ MariaDB database server
First we need to disable selinux.
Open SELinux configuration and edit the file:
[root@lampblogs ~]# vi /etc/sysconfig/selinuxChange “SELINUX=enforcing” to “SELINUX=disabled”
Save and exit the file. Then reboot the system.
Now you can check our article Install LAMP or follow below steps
Step 1: Install apache and start service
[root@lampblogs ~]# yum install httpd
[root@lampblogs ~]# systemctl start httpd
[root@lampblogs ~]# systemctl enable httpd
Step 2: Install php
Install epel and remi repos and install php 7
[root@lampblogs ~]# yum install epel-release
[root@lampblogs ~]# yum install http://rpms.remirepo.net/enterprise/remi-release-7.rpm
[root@lampblogs ~]# yum install yum-utils
[root@lampblogs ~]# yum-config-manager --enable remi-php71
[root@lampblogs ~]# yum install php php-pear php-cgi php-common php-mbstring php-snmp php-gd php-pecl-mysql php-xml php-mysql php-gettext php-bcmath
Modify php time zone by editing php.ini file
[root@lampblogs ~]# vi /etc/php.iniUncomment the following line and add your time zone.
date.timezone = Asia/KolkataStep 3: Install Mariadb
[root@lampblogs ~]# yum --enablerepo=remi install mariadb-server
[root@lampblogs ~]# systemctl start mariadb.service
[root@lampblogs ~]# systemctl enable mariadb
[root@lampblogs ~]# mysql_secure_installation
Add a new root password and continue. Then it will ask a few questions. Type “Y” to agree to that
Step 4: Create database zabbix
[root@lampblogs ~]# mysql -u root -p
Enter password:
Create database zabbix;
create user 'zabbixuser'@'localhost' identified BY 'strong password';
grant all privileges on zabbix.* to zabbixuser@localhost ;
exit
Also Read -> How to Install Nagios on Centos 7
Step 5: Install Zabbix
Add the Zabbix repository to the CentOS 7 system.
[root@lampblogs ~]# rpm -i https://repo.zabbix.com/zabbix/4.3/rhel/7/x86_64/zabbix-release-4.3-1.el7.noarch.rpmNow install Zabbix using the yum command as shown below
[root@lampblogs ~]# yum install zabbix-server-mysql zabbix-web-mysql zabbix-agent zabbix-get zabbix-apache-confWe hope you are following "How to Install and Configure Zabbix on Centos 7" step by step carefully. The remaining steps will help you to finish the upgrade process.
Step 6: zabbix frontend configuration
To begin using the Apache with the Zabbix server. Zabbix configuration file needs to be updated with TimeZone.
[root@lampblogs ~]# vi /etc/httpd/conf.d/zabbix.confUpdate the below line with correct timezone.
php_value date.timezone Asia/KolkataThen Restart Apache service.
[root@lampblogs ~]# systemctl restart httpdGenerally, Zabbix installation package gives SQL file which includes an initial schema and data for the Zabbix server with MySQL.
Change directory and go the Zabbix directory.
[root@lampblogs ~]# cd /usr/share/doc/zabbix-server-mysql-4.4.0
[root@lampblogs zabbix-server-mysql-4.4.0]# zcat create.sql.gz | mysql -u zabbixuser -p zabbix
Step 7: Update db configuration
[root@lampblogs ~]# vi /etc/zabbix/zabbix_server.confModify below parameters
DBHost=localhost
DBName=zabbix
DBUser=zabbixuser
DBPassword=password
Then save and exit the file and restart zabbix service.
systemctl restart zabbix-server zabbix-agent httpdAlso enable the service to start service automatically on boot.
systemctl enable zabbix-server zabbix-agent httpdStep 8: setup firewall
If fiewall service is running on your system,then configure the firewall to allow the Zabbix agent to contact zabbix server.
firewall-cmd --permanent --add-port=10050/tcp
firewall-cmd --permanent --add-port=10051/tcp
firewall-cmd --permanent --add-port=80/tcp
firewall-cmd --reload
Step 9: Zabbix web interface
open your web browser and type the url http://ip_address/zabbix
Next, it checks all the pre-requisites are set for Zabbix Installation, if any missed it tells us to fix those and click on next.

Next, it checks all the pre-requisites are set for Zabbix Installation, if any missed it tells us to fix those and click on next.
Now enter details of zabbix database,username and password details and click on next
Next, enter Zabbix server details, port number, and the name for Zabbix installation and click on Next step
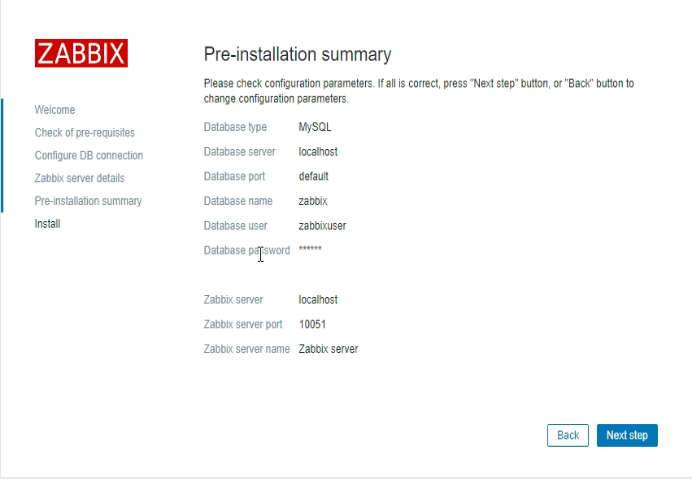
Next, you will see pre-installation summary as shown below. click on next step
you have completed the installation of Zabbix. Click the Finish button.
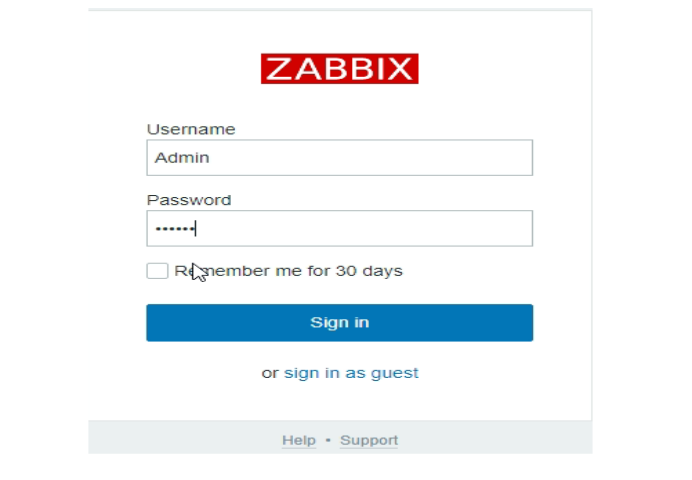
Next it rediects to webconsole to login with Admin user and password as zabbix.
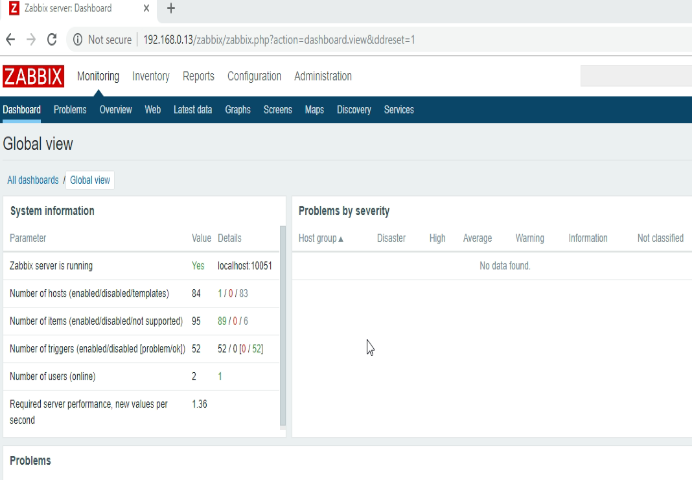
Thats'it. Now you have successfully configured zabbix server on centos 7 server.
Also Read -> How to Add Linux Host to Nagios Server