Install phpPgAdmin on centos 7
phpPgAdmin is a widely used PostgreSQL management tool. You can use it to manage PostgreSQL databases in webinterface.
Before starting the installation of PotgreSQL and phpPgAdmin make sure that you have root access on your CentOS server and your are connected to the internet for the downloading the packages.
Step 1 : install postgresql
We need to install postgresql, otherwise follow this article install postgresql
Step2 : install phppgadmin
# yum install phpPgAdminIf you want to install latest version download it from github url
[root@lampblogs ~]#cd /var/www/html
[root@lampblog html]#wget https://github.com/phppgadmin/phppgadmin/releases/download/REL_5-6-0/phpPgAdmin-5.6.0.tar.bz2
[root@lampblog html]#tar -jxvf phpPgAdmin-5.6.0.tar.bz2
[root@lampblogs html]# mv phpPgAdmin-5.6.0 phpPgAdmin
Step 3: configure postgresql
phpPgAdmin connects to the local postgresql server via network. We have to configure our postgresql server to accept local connections via md5 authentication.
[root@lampblogs ~]# vim /var/lib/pgsql/11/data/pg_hba.confPlease enter the value as per your requirements inIPv4 and Ipv6 connections and make sure it accepts md5 passwords.Add/Modify below lines
# IPv4 local connections:
host    all             all             127.0.0.1/32            md5
host    all             all             192.168.0.1/24          md5
# IPv6 local connections:
host    all             all             ::1/128                 md5
Step 4: configure postgresql - tcp/ip
By default, TCP/IP connection is disabled, so that the users from another computers can’t access postgresql. To allow to connect users from another computers, Edit below file
[root@lampblogs ~]# vim /var/lib/pgsql/11/data/postgresql.confFind below lines from above config
#listen_addresses = 'localhost'
#port = 5432
Uncomment both lines, and set the IP address of your postgresql server or set ‘*’ to listen from all clients as shown below
listen_addresses = '*'
port = 5432
Step 5: configure pgadmin
Edit file /etc/phpPgAdmin/config.inc.php, and do the following changes. Read them carefully to know why do you change these values.
vi /etc/phpPgAdmin/config.inc.phpFind following line
$conf['servers'][0]['host'] = '';
$conf['extra_login_security'] = true;
and change as below
$conf['servers'][0]['host'] = 'localhost';
$conf['extra_login_security'] = false;
If you installed latest version as mentioned step3 then edit below file.
vi /var/www/html/phpPgAdmin/conf/config.inc.phpStep 6: Restart postgresql now
[root@lampblogs ~]# systemctl restart postgresql-11.serviceStep 7: configure Apache for pgadmin
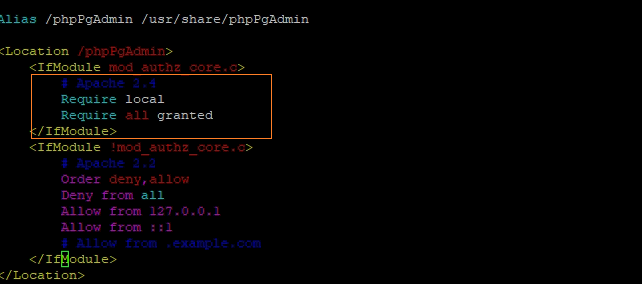
# vim /etc/httpd/conf.d/phpPgAdmin.conf
If you installed latest version as mentioned in step 3 then
Create the following config file in /etc/httpd/conf.d/phpPgAdmin.conf
Alias /phpPgAdmin /var/www/html/phpPgAdmin
<Location /phpPgAdmin>
<IfModule mod_authz_core.c>
Apache 2.4
#Require local
Require all granted
#Require host .lampblogs.com
</IfModule>
<IfModule !mod_authz_core.c>
# Apache 2.2
Order deny,allow
Deny from all
Allow from 127.0.0.1
Allow from ::1
# Allow from .lampblogs.com
</IfModule>
</Location>
Step 8: Restart Apache service
[root@lampblogs ~]# systemctl restart httpdStep 9: Configure firewall and Allow Apache/php
sudo firewall-cmd --zone=public --permanent --add-service=http
sudo firewall-cmd --zone=public --permanent --add-port=5432/tcp
sudo firewall-cmd --reload
If selinux is enabled then you need to set selinux to allow httpd to connect to your database via network sockets.
setsebool -P httpd_can_network_connect_db on
setsebool -P httpd_can_network_connect on
Step 10: Access phpPgAdmin
Now you can access phpPgAdmin in browser like below.
Ex: http://ip_address/phpPgAdmin

That’s it. Now you’ll able to create, delete and alter databases graphically using phpPgAdmin easily.


